Monday, November 23, 2009

back wall and brace


Dodgy photo i know but i wanted to clear out the background so you could really see what i have done here.

at the top is the back wall, i created and cleaned that up first as i know once i get the template in it won't be possible to clean it up, its easy to do as the "fondue" /mortar dries really quickly.

Then i got 4 bars and created a brace around the side walls, the reason is the downward pressure from the weight of the arch bricks may have force the walls to fall over, the bars are simply bolted at each corner and positioned right against the walls. it proved true as i noticed the tension on the bars tighten as i started laying the arch bricks. I plan to concrete the outside over the insulation so that will secure the walls and add strength.

you can see i have the template ready and levelled, i placed newspaper over the top to make it easier to remove the template once the mortar is dried, it will make it easier to clean up the inside as well. No doubt there will need to be some pointing needed to get a good inside finish.

So its all ready to go.

Creating the arch

Now the walls are up its time to layout the dome/arch and check the template fits !!
you can see here i have propped the arch template on bricks, it was slightly to high when we actually went to mortar the arch so i used some different sized bricks to get it level.


Saturday, November 14, 2009

oven to small?

Looking at it now it might seem the internal oven space is to small compared to others i have seen but i would say its perfect for what we want to do with it, we don't want to labour for hours setting it up, cleaning it, etc etc.

you should pick the size that will produce the results you want, eg: more size MORE WOOD ! more $$$ each time you want to use it.

this one will do 4 good sized pizzas, roasts, various breads, baguettes , "beer can chicken" etc so its just fine for our family.

Angle bricks for dome

So I have now put in the angle bricks that will help the dome bricks make the arch without to much use of mortar as they are rectangle bricks not shaped bricks.

once this excess was all cleaned up it looked really good, all i do is a scourer and then a sponge, it may look in the image that the back is also angled but it isn't. you can see the ash dump hole infront.
this was just a mock up (no mortar) before i did the angles, just making sure i have the right plan in my head. you can see here left the hole for the ash dump, i have set up the entry width, and i have mapped out the front of the oven to make sure its all going to fit. what you can't see here is the BIG consideration of where the chimney will be, which is almost directly above the ash dump.


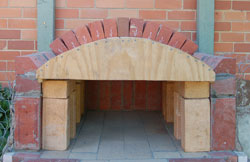
Here's my daughter in the oven with some mockup bricks at the front for the drop down bricks which help th esmoke come out of the oven and up the chimney, its called "draw" so google it.
you can get an idea of the internal height by counting the bricks in the background.
this is a good vid for the drop brick "look" http://www.youtube.com/watch?v=revPSeHiJDw&feature=related at 58secs into it, but i can't work out if they have a chimney or the smoke comes out the front???
here you see a good look at my front layout, the dome will be where the angle bricks are, then there will be a front section that has angled bricks to "drop" the smoke, then there is a brick (2 bricks upright) that will be the chimney space. what you can't see in this image is the FRONT FRONT section which will be the arch that SHOULD not get any smoke and not turn black as i am using cream bricks, ALL the smoke should exit before then.
you can see i have plenty of room at the front to achieve this.
the oven door is 34cm wide and 34cms high.
i saw today a statement that the oven door should be 2/3rds of the height of the interior, thus my interior needs to be 51cm ..ish high, i think the sides are that but the top of the dome is @ 70cm+ i think?

Monday, November 9, 2009

Oven Walls done

First thing I did was go through all th ebricks i have and sort them, I sorted them into "dome" bricks, these are the best ones, straight edges - no chips etc. Next is "wall" bricks, once again straight edges but only needed to be on 1 side and i put the chipped corners to the outside. Lastly "whats left" they will be the chimney, back wall bricks etc.
Here I have placed the dome template on th efloor to make sure the bricks get laid at the correct width, you'll notice the white row on the outside, I opted to not cut any of the floor bricks instead i moved the side brick in and added some hebel on the ouside to support the wall. the main reason i did this is it will be easy to replace the oven floor if it gets worn any time in the future as those bricks are not supporting the wall.

I then moved the template up to ensure it was all straight vertically and rendered the outside of the oven to ensure no gaps


I then removed the template and filled the gaps in any bricks on the inside, I had some mortar left over so i added some chicken wire to the sides and back and pushed more mortar into it, once this dries I'll peel the top chicken wire CAREFULLY back and do my next layers (you can see the 2 bricks sitting ontop of the left wall).

This will give me an extra brick height and then the slanted brick to facilitate the angle of the dome, having an angle brick helps reduce the arch angle and the amount of mortar needed to join the bricks.


Monday, November 2, 2009

pizza floor

Finally we laid the pizza oven floor, below are 4 images of the progress. the first


image is the base of sand and on the right is some bricks as guides as to where i'm going to lay the floor and the projected front arches for chimney etc.


I then laid the "fondue" onto the sand, the plan was to place the bricks onto the floor and smack them with a rubber mallet to get them level/even, thus the mortar/fondue would give way to make this happen...WHAT actually happened was the fondur dried really quickly so i had to keep wetting it and it ended up being a real RACE for time. that area you see there is just 65cm sq so it wasn't a large area. if i did it again i would definatel have help and mix less mortar at any 1 time.

As it was i mixed just 30litres (mass), that is 2.5fondue - 1water - 4sand, THUS that was converted to 10litres of fondue - 4litres of water - 16litres of sand.


I put a sliver of mortar between the bricks, i have been told (by an expert) that this helps stop the ash from falling through the gaps and eventually forcing the bricks up thus making you have to re-lay the floor.

We also then "grouted" the bricks to make sure no gaps, it got messy but it was easily washed off with just water.

Saturday, October 17, 2009

Final Layout preview

Heres a shot of bricks just placed where i kinda think they will go, its really good to do a dry run like this as i learnt alot just by seeing the gaps in the bricks, the slight missalignments, the odd floor brick thats rocking unlevel, how much side room i have, the actual position of the ash drop, how much room i have at the back and front etc etc.
The BIGGEST thing i learnt here was that the first FIRST thing you should do, as in the very first before you lay the bottom concrete is to choose your pizza oven floor bricks as how they measure up will/SHOULD decide the oven dimensions.

I didn't do this and i'm regretting it as i have had to do a bit of a "fix" to the design to accommodate. I'll need to cut some floor bricks to size, no big hassle but it would of been better if i didn't have to.

I decided to invest in proper base bricks (the white ones) and the proper mortar (fondue), the bricks were $4AUD each and the 20kg bag was $50.